I’m not really the craftsy type, but when my sister showed me a picture she’d found online of a clear ball Christmas ornament filled with miniature “books,” I really wanted to try to make my own. It turned out to be fairly simple, even for someone as artistically challenge as me.
The picture below is the final project, but scroll down to see details.

Though this is easily the kind of project that I might normally think about and never do, I set to work on a list of books I’d want to include. I went through my reviews and narrowed it down, not just to books I’ve rated the highest, but books I know I’ll re-read someday (or already have). Books I bought after reading them because I liked them so much. Books that were the biggest parts of my childhood. (My own books, of course, as well as the book my daughter wrote and we got printed a few years back.) From series that I enjoyed, I included either the first in the series or my favorite of the series. In the end, I had 49 books.
I found clear, empty ornaments at Walmart and got 2 different sizes, not sure what I would need, and started with the smaller one. I also picked up a sheet of thin, flexible craft foam. I measured the opening of the ornament, which was 3/4″, and started a spreadsheet of 3/4″-wide columns, with thin gutter columns in between. I already knew where to find cover images that could then be shrunk down and printed. When possible, I chose the cover image that actually represents the version I read/own. Each book cover image I inserted was then shrunk to fit the width of the cell, so the height of each cover varied based on the original size of the cover image.

After printing the file on card stock, then came the easy, yet time-consuming task of cutting out the little covers. I did it all by hand, because I didn’t trust my paper cutter to be precise enough and didn’t want edges cut off. Covers that were really light or had white backgrounds were the hardest, because it was difficult to make sure I was staying along the edge. Using small adhesive squares, rather than dealing with double-sided tape, I attached one image at a time to the edge of the craft foam, using an X-acto knife to cut along the edge of the image. I had 2 copies of each cover, so both sides of the foam would be the front cover. That way, no matter which way faces up inside the ornament, you see the front. For long books (like the full LOTR trilogy, seen near the bottom of the in-progress picture on the left below), I attached two pieces of foam together to make the little book thicker.
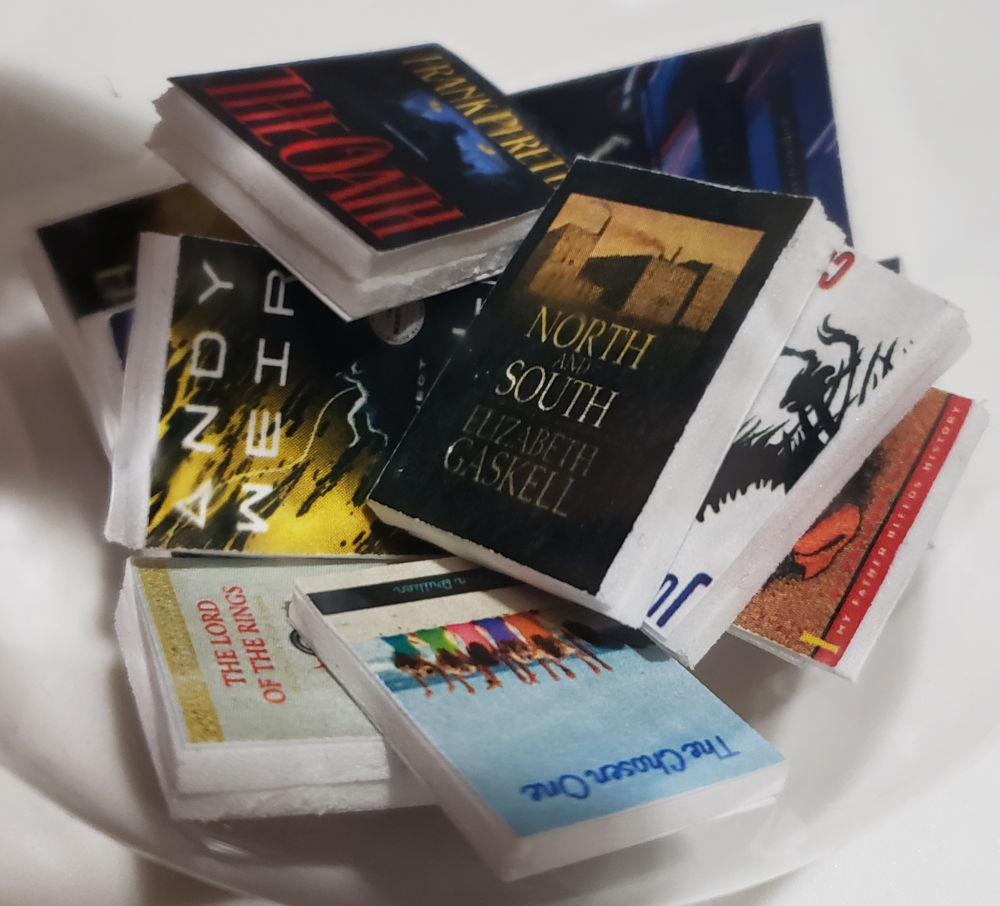

I’d made less than half of the books before I realized that they weren’t all going to fit in the smaller ornament that I started with. And I definitely couldn’t get them back out through the small opening without hurting them. I had to cut open the ornament to get them out and move them to the larger one. Good thing they were only $1 each.
I absolutely love the result! Directly below is the image my sister originally showed me, and pictures of my finished ornament are below that. I like it so much that I will probably not put it away with the rest of the ornaments after the season ends and plan instead to find somewhere near my desk to hang it instead. And most likely, at the end of every year, I’ll add new favorites from that year’s reading. After finishing mine, I even made an equivalent for my husband with board game boxes (see picture at bottom).


How about you? Have you done anything to make your holiday more bookish?
